Shoulder Prehab: 7 Exercises to Protect Your Rotator Cuff
This is for anyone who presses, pulls, swims, throws, does yoga, or sits at a desk, which is to say almost everyone with shoulders. You will get a plain-language tour of how the shoulder works, the three habits that get it hurt, and seven shoulder prehab exercises with sets, reps, and the cues I use with clients. At the end I show you how to fit them into a warm-up or a standalone session, and the signs that mean it is time to see a professional instead of reading a blog post.
The shoulder in two paragraphs
Your shoulder is a ball-and-socket joint, but the socket is shallow, closer to a golf ball sitting on a tee than to the deep cup of your hip. That shallow socket is why your arm can reach overhead, behind your back, and across your body. It is also why the shoulder depends on muscle, not bone, to stay in place. The rotator cuff is a group of four small muscles that wrap around the ball and keep it centered in the socket while the bigger muscles (chest, lats, deltoids) move the arm. When the cuff is weak or tired, the ball drifts and the tissues around it get pinched or strained.
The second half of the story is the shoulder blade, or scapula. The socket is part of the shoulder blade, and the blade floats on your ribcage, held there by muscles like the serratus anterior, the rhomboids, and the lower trapezius. If the blade does not move well (rotating upward as you reach overhead, gliding back as you row), the joint works from a wobbly platform. Good shoulder prehab trains both: the cuff to center the ball, and the muscles around the blade to give it a stable base.
Why shoulders get hurt
Three patterns show up again and again.
Pressing without pulling. Bench press, push-ups, and overhead press are satisfying, so people do a lot of them and skip rows. Over time the front of the shoulder gets strong and tight, the back gets weak and long, and the ball gets dragged forward in its socket. A simple rule from my strength training guide for beginners is to pair every press with a pull: shoulder press with bent-over rows, push-ups with band pull-aparts.
Desk posture. Hours of forward head, rounded upper back, and shoulders rolled in put the blade in a poor starting position and shorten the chest. Then you go to the gym and ask that shoulder to go overhead. It cannot, so the lower back arches and the neck shrugs to make up the difference.
Poor overhead mechanics. Shrugging into the ears, flaring the ribs, and pressing a weight that is too heavy for the cuff to control all stress the same tissues. If you cannot press a weight without arching backward, it is too heavy. That is a rule I repeat constantly, and the fix is lighter weight plus the exercises below.
Prehab, the way I use the word, is proactive work on the areas most likely to get hurt. For the shoulder, that means a few minutes of cuff and blade work most days, with form that is close to perfect, because a sloppy corrective exercise corrects nothing.
The seven exercises
For all of these, lighter is better. If you cannot feel the muscles between and below your shoulder blades working, drop the resistance and slow down.
1. Band pull-aparts
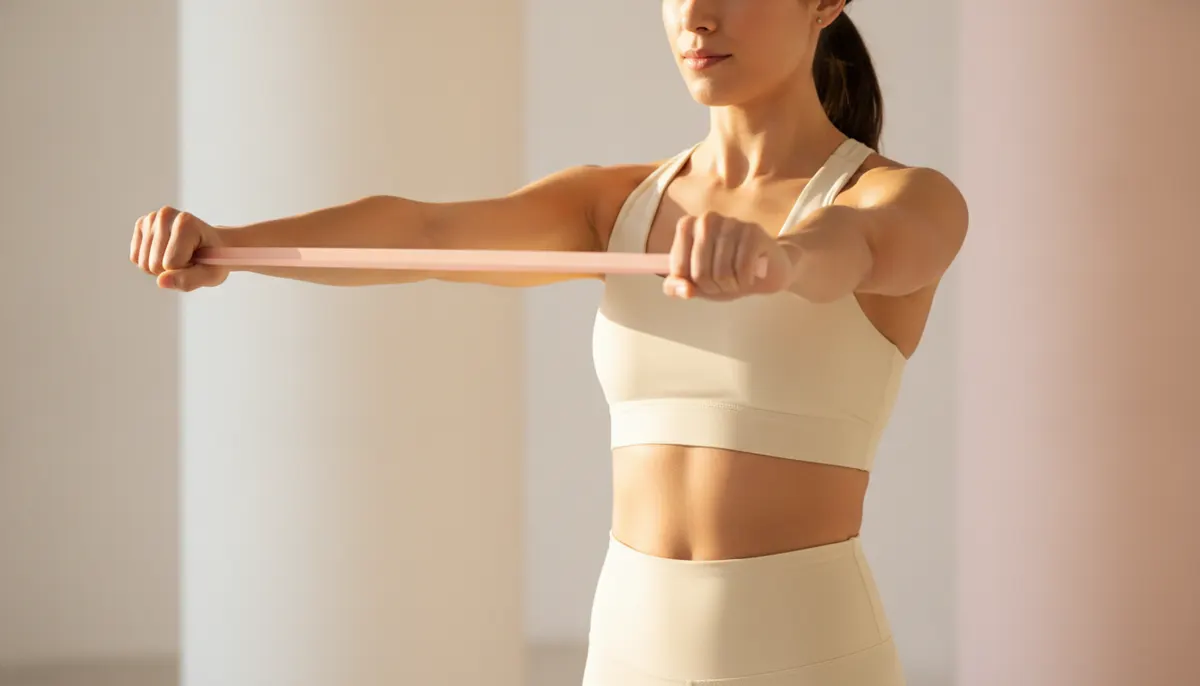
Hold a light resistance band in front of you at shoulder height, hands a little wider than your shoulders, arms straight. Pull the band apart until it touches your chest, squeezing your shoulder blades together, then return slowly.
Sets and reps: 2 to 3 sets of 15 to 20.
Cues: Keep your ribs down and your shoulders away from your ears. Pause for a full second with the band on your chest. If your lower back arches or you shrug, the band is too heavy. Alternate between palms down and palms up from set to set to work the cuff from slightly different angles.
2. Banded external rotation
Anchor a band at elbow height. Stand sideways to it, hold the band with the hand farthest from the anchor, and tuck that elbow against your ribs with your forearm across your belly. Keeping your elbow pinned, rotate your forearm outward until it points straight ahead, then control it back.
Sets and reps: 2 to 3 sets of 12 to 15 per side.
Cues: Put a folded towel between your elbow and your ribs; if it falls, the elbow is drifting. Keep your wrist straight and your shoulder blade still. This is a small movement for a small muscle; it should feel like effort, not strain.
3. Face pulls
Set a band or cable at about face height. Grab it with an overhand grip, step back until the band is taut, and pull toward your face with your elbows high and wide. Finish with your hands beside your ears and your thumbs pointing behind you, then return under control.
Sets and reps: 2 to 3 sets of 12 to 15.
Cues: Lead with the elbows, not the hands. Do not lean back; if you need to, lighten the load. The finish position, hands back and elbows up, is where the cuff does its work, so pause there for a beat.
4. Scapular push-ups
Get into a high plank with your hands under your shoulders and your arms completely straight. Without bending your elbows, let your chest sink toward the floor as your shoulder blades pinch together. Then push the floor away so your blades spread apart and your upper back rounds slightly.
Sets and reps: 2 sets of 10 to 12.
Cues: The elbows stay locked for the entire set; the only movement is the blades sliding on the ribcage. Brace your trunk so your hips do not sag. If a full plank is too much, do these on your knees or standing with your hands on a wall.
5. Wall slides
Stand with your back to a wall, feet about six inches away, and lean back so your hips, upper back, and head touch it. Tuck your ribs so your lower back is close to the wall. Raise your arms into a goalpost shape, elbows bent to 90 degrees, with the backs of your hands and forearms touching the wall if you can. Slide your arms up the wall as high as you can while keeping contact, then slide back down.
Sets and reps: 2 sets of 8 to 10.
Cues: Do not force the contact. If your hands come off the wall as you go higher, stop there; that is your current range, and it will improve. If the ribs flare or the lower back arches away from the wall, you have gone too far. Slow and honest beats high and cheating.
6. Kettlebell arm bar
Lie on your back holding a light kettlebell in your right hand, arm straight and vertical, palm facing the sky. Bend your right knee and plant the foot, then roll onto your left side while keeping the arm pointed straight at the ceiling. Let your right leg come across and rest on the floor, extend your left arm overhead along the ground, and hold.
Sets and reps: 2 sets of 3 to 5 slow breaths per side.
Cues: Start lighter than you think you need, and keep the arm vertical throughout. Drive the roll from your hips and glutes, not your shoulder or upper back. I walk through the arm bar in detail, including how to add a small rotation at the top once the basics are solid, in my foundational prehab exercises, and it earns its place here because it teaches the cuff to stabilize a load while the rest of the body moves.
7. Prone Y-T-W
Lie face down on the floor or a bench with your forehead resting on a folded towel. With your thumbs pointing up, lift your arms into a Y shape (overhead and wide), lower, lift into a T (straight out to the sides), lower, then lift into a W (elbows bent and pulled down toward your back pockets). That is one round.
Sets and reps: 2 sets of 6 to 8 rounds.
Cues: Lift from the shoulder blades, not the lower back; your chest stays on the floor. Keep your neck long. Use no weight for the first couple of weeks, then add one- or two-pound dumbbells, and resist going heavier even when it feels easy. Hold each letter for two seconds.
How to program it
You do not need all seven every day. Here are the two ways I use them.
As a warm-up
Before any upper body session, run this five-minute block right after your general warm-up:
- Band pull-aparts, 1 set of 15
- Banded external rotation, 1 set of 12 per side
- Scapular push-ups, 1 set of 10
- Wall slides, 1 set of 8
That is enough to wake up the cuff and get the blades moving before you load them. It slots neatly into the activation step of my 8-minute dynamic warm-up, which is where I put it on pressing days.
As a standalone session
Twice a week, do all seven in order with the full sets and reps. It takes 15 to 20 minutes. I like to pair it on a rest day with my hip mobility routine, which gives you a complete maintenance session for the two joints most likely to limit your training.
The press-to-pull rule
Whichever version you use, keep an eye on your weekly balance. Count your pressing sets and your pulling sets. If pressing wins by a wide margin, add rows and face pulls until the two are at least even. A surprising number of cranky shoulders settle down with that one change.
Red flags that mean see a professional
Prehab is for shoulders that are healthy or mildly irritable. It is not rehab, and it is not a substitute for a diagnosis. Stop and see a physical therapist or a doctor if you notice any of these:
- Sharp or stabbing pain during any exercise, as opposed to muscle fatigue
- Pain that wakes you at night or makes lying on that side impossible
- Weakness when lifting the arm, or an arm that drops when you try to hold it out
- Numbness or tingling into the arm or hand
- Clicking or clunking that comes with pain
- Pain following a fall, a wrench, or a sudden pull
- No improvement after three weeks of consistent, careful prehab
A good physical therapist will likely give you versions of these exact exercises, scaled to what your shoulder can handle right now. Going earlier means a shorter road back.
Common mistakes
Going heavy. The cuff muscles are small. Loading them like a bench press turns the exercise into a chest and deltoid movement, and the cuff never gets trained.
Shrugging. If your shoulders creep toward your ears during pull-aparts or wall slides, the upper traps are doing the job the lower traps and the cuff should do. Set the shoulders down first, then move.
Rushing. These are two-seconds-up, two-seconds-down movements. Momentum removes the stability work.
Holding your breath. Exhale on the effort, inhale on the return.
Doing it once. A single session changes nothing. Three short sessions a week for a couple of months changes how your shoulders feel for years.
Where to go next
A stable shoulder sits on a stable trunk, so the best next read is my guide to core stability exercises, which teaches the bracing that scapular push-ups and the arm bar depend on. If you are building your first strength program and want to know how many pressing and pulling sets to plan each week, my guide to sets and reps for beginners lays out a simple full-body template that keeps the balance right from the start.